Supplemental Guides
You Will Need
| ESP32 NodeMCU |
| MicroUSB Cable |
| Computer running Windows, Linux, or MacOSX |
Background
In the process of learning MicroPython for myself, I have used many different setups for programming microcontrollers. Through my journey, I found that the most streamlined and simple way of programming a microcontroller with MicroPython is through a program called Thonny. Thonny is a Python IDE that keeps the process of programming a microcontroller simple, which is great for beginners.
After Thonny is installed, we will go over getting Thonny setup for an ESP32 NodeMCU, flashing the MicroPython firmware, and writing a simple program for the ESP32 device using MicroPython.
Downloads
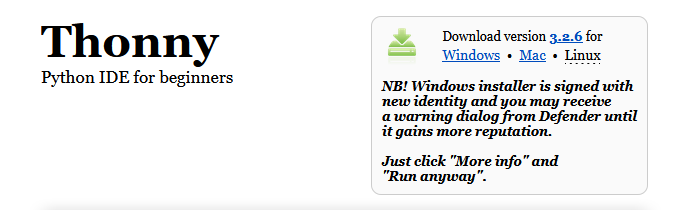
Thonny
If you are using Linux, I recommend installing Thonny using pip. On Windows and MacOSX I recommend installing Thonny through the download links on its website.
Install Thonny from Thonny.org
Download the Thonny installer from thonny.org and run it.
Download Thonny from its website.
 |
Install Thonny using Pip
Open a terminal and enter pip install thonny. If the process fails, try running the same command again with elevated permissions (sudo).
Acquiring Micropython Firmware
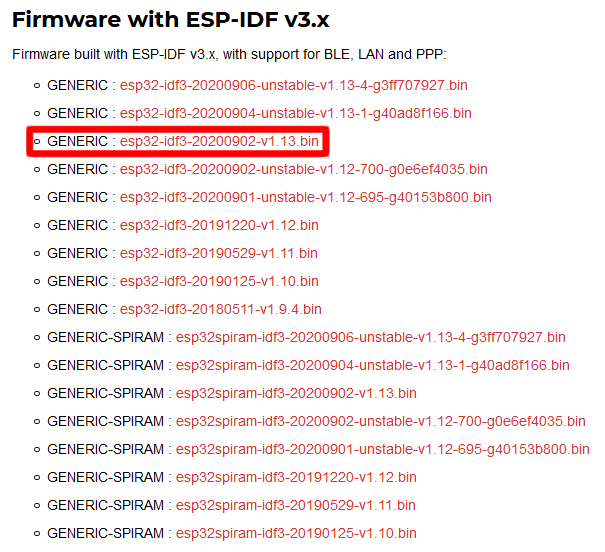
From the Micropython website, download the latest stable binary (.bin) file for ESP32 microcontrollers under the “Firmware with ESP-IDF v3.x” marked as “GENERIC”. The latest firmware should be at the very top.
Take note of its location in your filesystem after downloading.
Download the latest MicroPython firmware for 'GENERIC' ESP32 microcontrollers with ESP-IDF v3.x.
 |
Thonny Setup
Plug your ESP32 NodeMCU into your computer using a microUSB cable and launch Thonny.
Identify Port of Device
Now would be a good time to find out which port your device is on. If you are not familiar with how to to do this, you should check our guide on the subject: How To Find Your Device’s Port. Take note of what your port is.
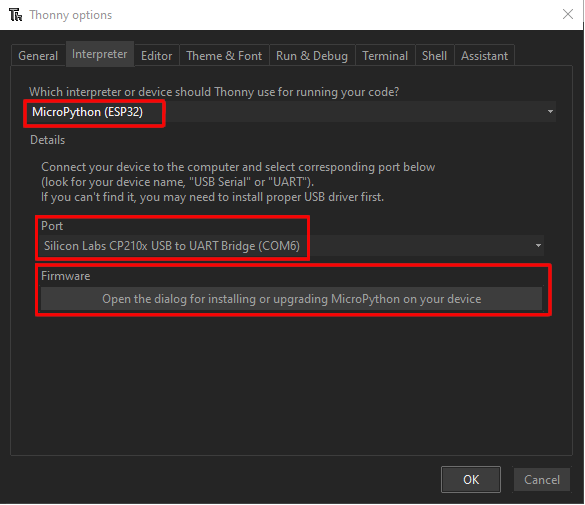
Select Interpreter
Next navigate to “Run > Select Interpreter”. Under the “Which interpreter or device should Thonny use for running your code?” label, select “MicroPython (ESP32)”.
Select your NodeMCU’s port under “Port”.
Set the interpreter and the port.
 |
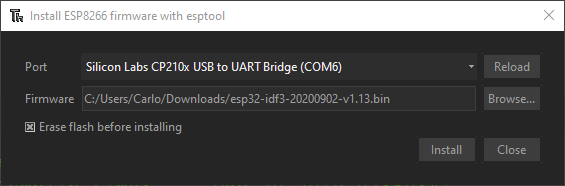
After setting the interpreter and the port, click on the button that says “Open the dialog for installing or upgrading
MicroPython on your device”. Select your device’s port again, and browse for the MicroPython firmware that you downloaded earlier for the “Firmware” field. Make sure that “Erase flash before installing” is checked, then click “Install”.
Set the correct parameters for flashing the MicroPython firmware to an ESP32 microcontroller.
 |
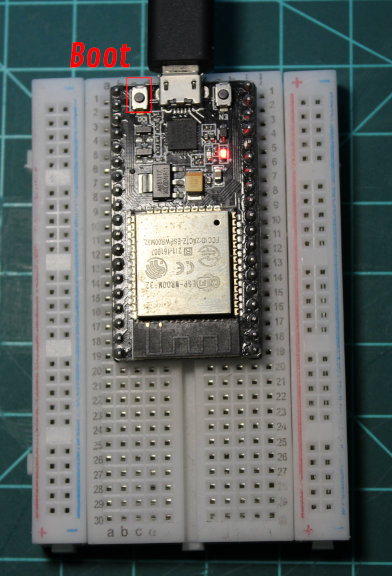
When the “Erasing Flash” dialog appears press and hold the “BOOT” button on the ESP32 NodeMCU until you see the text start to move, then you can release the button. If you do not see a button labeled as “BOOT”, press and hold the button on the left side of the NodeMCU when the USB port is facing up.
NodeMCU's from different sources may have different labeling.
 |
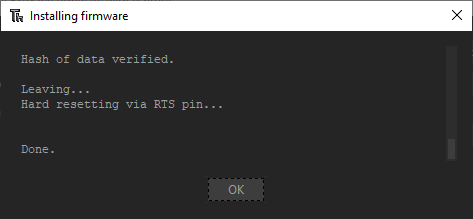
Thonny will now erase any existing firmware and then flash the MicroPython firmware on your NodeMCU. This may take a few minutes.
After the firmware has finished installing, you may close all of the open dialogs.
Thonny has completed flashing the firmware on the microcontroller.
 |
Firmware Test
At the bottom of the Thonny window in the tab labeled “Shell” you should see text that resembles the image below.
MicroPython repl ready for input.
 |
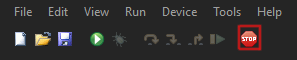
If the last line of the repl is not >>> then your REPL isn’t ready for input. To fix this press the stop button at the top of the Thonny window. This often means that the microcontroller is running something that must be stopped before being able to be given REPL commands.
Issue stop command to microcontroller.
 |
If the last line of your repl is >>>, then you are ready to move on.
Hello World
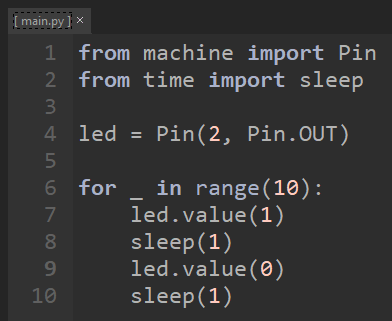
Lets write a quick “Hello World” program to demonstrate MicroPython on an ESP32 NodeMCU. Write or copy the following code into the editor area in Thonny.
from machine import Pin
from time import sleep

led = Pin(2, Pin.OUT)

for _ in range(10):
    led.value(1)
    sleep(1)
    led.value(0)
    sleep(1)
A blinking LED is the hardware version of a 'Hello World' program.
 |
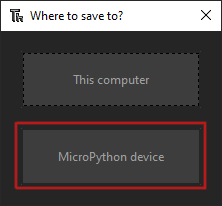
After writing the program navigate to “File > Save As”. You will then get a window asking whether to save the file to your computer or the microcontroller. Select “MicroPython device”.
Select the option to save the file to the 'MicroPython device'.
 |
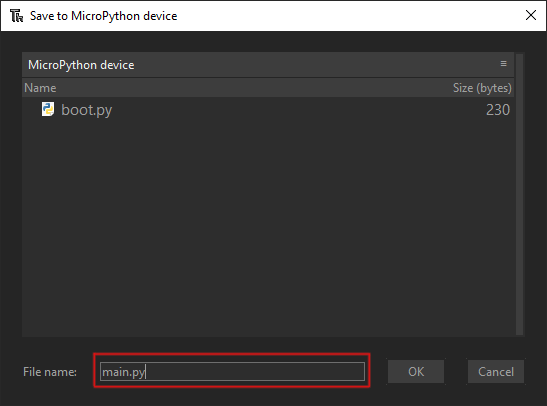
Now name the file “main.py” and click “Ok”. It is important to name the file “main.py” because the MicroPython always runs “boot.py” first and then looks for “main.py” to run second.
Name the file 'main.py'.
 |
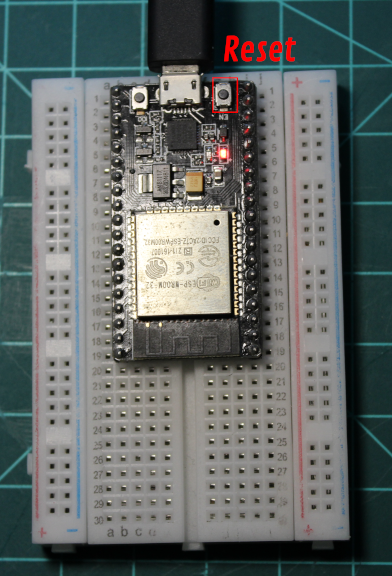
After the program file is saved onto the ESP32 NodeMCU, run the program by pressing the reset button on the top right of the ESP32 NodeMCU. On my NodeMCU it is labeled as “EN”.
NodeMCU's from different sources may have different labeling.
 |
You should see that the ESP32 NodeMCU runs the program that we wrote and the built-in LED on the device blinks every second.
A ESP32 NodeMCU running the blink script.
 |
You have now written and run your first program for the ESP32 NodeMCU using MicroPython. I encourage you to experiment by testing your own code in ‘main.py’
Next guide: GPIO Input and Output with an ESP32 NodeMCU and MicroPython