Tinkerdoodle is a project by Junfeng Zhou. On the Tinkerdoodle website, the service is described as “a free IDE for IOT projects”. Tinkerdoodle uses interactive Jupyter Notebooks to combine explanatory text and code to create effective guides for teaching MicroPython.
Genesis
Junfeng describes Tinkerdoodle as “the product of [him] exploring the best way to teach Python and circuits.” The idea for Tinkerdoodle came from when Junfeng started coaching a group of students (including his own kids) to make circuit projects with MicroPython and ESP8266 microcontrollers. To make his teaching more effective, he set up a Jupyter Notebook server with a MicroPython kernel on a Raspberry Pi. Students could then connect their microcontrollers directly to this Raspberry Pi through a shared USB hub, and interact with them through the Jupyter Notebooks.
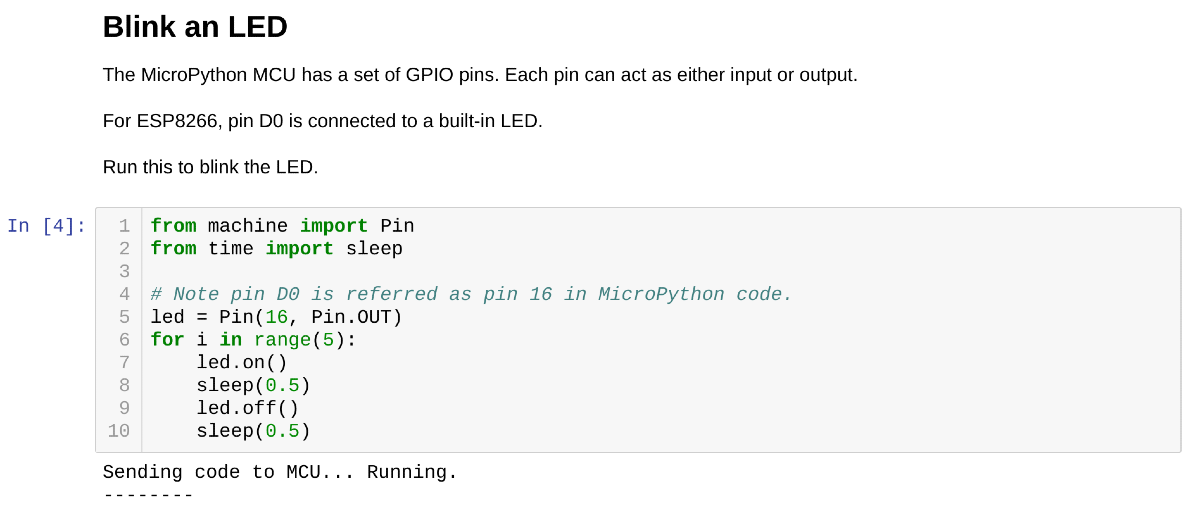
Micropython code in a Jupyter notebook on Tinkerdoodle.
 |
Adapting to COVID-19
The COVID-19 pandemic introduced a lot of challenges for all of us. In person classes needed to change, but it was an unreasonable expectation for every student to set up a development environment on their local computer when learning from home. In response, Junfeng started to explore alternate options for coaching his students. This is when he came across the WebUSB standard.
The W3C Community Group Draft Report describes WebUSB as “a way to safely expose USB device services to the web”. Effectively, WebUSB allows users to connect USB devices to a web application. Junfeng knew that this would be ideal for adapting his class to the new COVID-19 remote learning environment, so he took the initiative to integrate WebUSB into his Jupyter Notebook server. It took some trial and error due to WebUSB being an evolving standard with limited documentation. However, he was able to get it working! He called his new WebUSB enabled Jupyter Notebook server “Tinkerdoodle” and you can try it out yourself at www.tinkerdoodle.cc.
Moving Forward with Tinkerdoodle
Using Tinkerdoodle to host his MicroPython learning content, Junfeng was able to continue coaching his students remotely through the COVID-19 pandemic. Junfeng also realized that he created something that the broader MicroPython community could use. There is already a web IDE for developing for Arduino microcontrollers, but prior to Tinkerdoodle there was no web IDE for MicroPython. Junfeng also hopes that more makers will look into using Jupyter Notebooks for their projects.
My Thoughts on Tinkerdoodle
I was really excited when I saw what the first community submission was. A fun fact about the name “Micronote” is that the name comes from a combination of “microcontroller” and “notebook”. Obviously the “microcontroller” part comes from Micronote’s focus on making microcontroller programming more accessible, but the “notebook” part comes from our intention to use interactive notebooks like Jupyter to present content in a classroom setting.
Before hearing about Tinkerdoodle, my intention was to use something like nteract to get Micronote’s content into classrooms. nteract uses Electron to run Jupyter Notebooks without use of the browser. It is simple and more accessible than base Jupyter Notebooks or JupyterLab, but it still runs into the same problems that Junfeng describes. The reality is that expecting users to setup their own development environment increases the barrier of entry to programming microcontrollers. Tinkerdoodle is very effective at breaking down this barrier of entry, and I will seriously consider using it to host Micronote’s classroom content in the future.
Using Tinkerdoodle
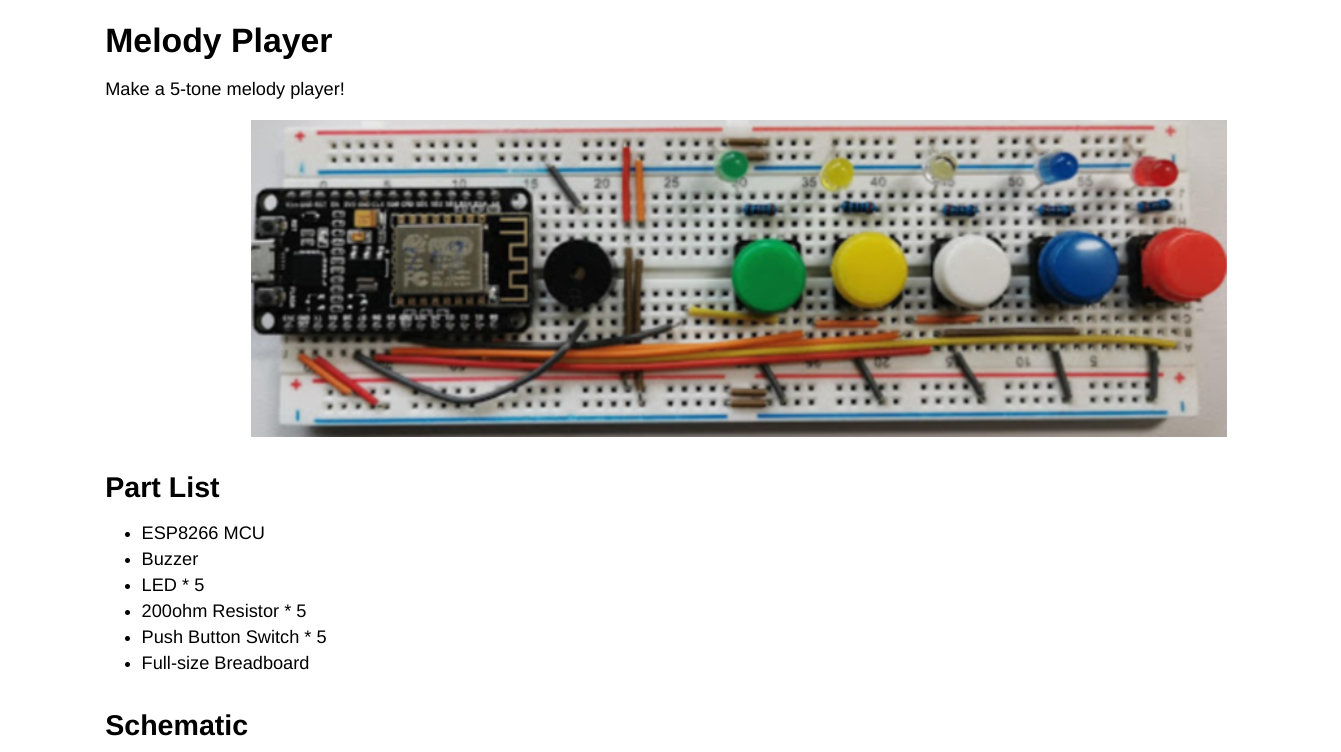
Tinkerdoodle has some example project notebooks that you immediately have access to upon creation of your account. One of these examples is “Melody Player”, a tutorial for using buttons and a buzzer with an ESP8266 MCU to create music. The other example is “Google Assistant Enabled Weather Station”, which is a tutorial for using an ESP32 MCU and a DHT11 temperature and humidity sensor to create a weather station that can be accessed through Google Assistant.
One of Tinkerdoodle's example projects: 'Melody Player'.
 |
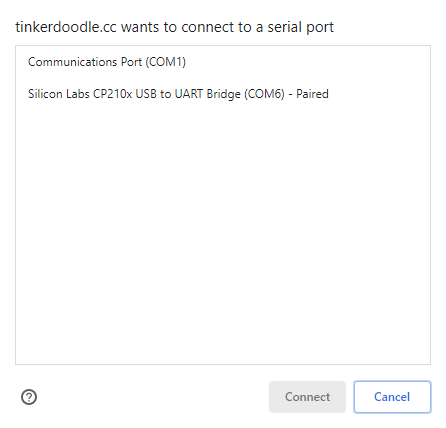
To test Tinkerdoodle, I uploaded my work-in-progress classroom content for the Atlas kit and ran through each of the cells. To start, you press the connect button on the toolbar at the top of the notebook page and select your device.
Connecting to a serial port from Tinkerdoodle in Chrome.
 |
After your microcontroller connects, you can run cells containing MicroPython code. The code will be sent to your device where it will run.
Connecting the Atlas kit to Tinkerdoodle and running through some cells.
 |
Tinkerdoodle as an IDE
I found Tinkerdoodle to be very effective as an IDE for creating educational content for classrooms. The environment that Tinkerdoodle creates has all of the tools available that are needed for creating MicroPython classroom content. I no longer need to simultaneously use a local IDE, run a Jupyter notebook server, and have a connection to my MicroPython microcontroller to develop content. Instead, I can upload all of the files I’m working on to Tinkerdoodle, connect, and start working immediately. I also have the added bonus of being able to access my files on Tinkerdoodle from anywhere through logging into my Tinkerdoodle workspace on any computer.
What’s Next for Tinkerdoodle
Junfeng intends for Tinkerdoodle “to be a community instead of merely a product.” He intends to add more features based on what the makers using the platform need. As the Tinkerdoodle community grows he intends to add more sample projects and learning materials to the platform.
I am excited to see where Tinkerdoodle ends up in the future! Once again you can check out Tinkerdoodle at www.tinkerdoodle.cc.